2024-12-28
SplatNet 3 Token MITMProxy Guide
[Updated guide for NSO app ≥3.0.1.](https://blog.northwestw.in/p/2025/06/20/splatnet-3-token-guide-for) This post will be kept as an archive.
This is the guide mentioned in the [previous post](https://blog.northwestw.in/p/2024/12/28/nso-app-mitmproxy-madness).
It's mainly based on [this comment](https://github.com/frozenpandaman/s3s/issues/198#issuecomment-2561475617), in the s3s repository,
as well as my trial and error.
Prerequisites
You will need the following 2 things to do this:
This guide will be focused on the Linux OS primarily, as that's what I'm using, and therefore all my experience were associated with it.
This guide also assumes that you only have 1 Android device (emulator or not) running/connected at the time.
If you are using Linux like me, you should install Android Studio from your distro's package manager.
For example, on Arch Linux, I installed it from the AUR with `yay -S android-studio`.
For other OSes, check [this installation page](https://developer.android.com/studio/install).
Similarly for MITMProxy, I installed it with `pacman -S mitmproxy`.
They also have an installation guide [here](https://docs.mitmproxy.org/stable/overview-installation/).
Creating an Android Emulator
After installation, you want to create an Android Virtual Device (AVD).
- Launch Android Studio. I don't know what happens when you first launch it, but you need to navigate to the "Welcome to Android Studio" window.
- Click the three dots in the top-right corner, and open the "Virtual Device Manager".
- Click the "+" button in the top-left corner. A window for creating an AVD should open.
- Select the device "Pixel 6" (I don't know if this matters, but it works so let's stick with it) and click next.
-
Now you should be asked to select a system image. Here, find "Tiramisu" (API 33).
- You probably don't have it downloaded. If you had downloaded it, you should redownload it. See the next section for redownloading.
Assuming you don't have it downloaded, click the download icon right next to the release name and wait.
After it is downloaded, select it and click next.
Name your AVD and click finish.
Redownloading System Image
- Go back to the "Welcome" window. Hit the three dots again and open SDK Manager this time.
- Find "Android 13.0 (Tiramisu)", which should be checked.
- Uncheck it and click apply. You will be prompted to delete the image. Say yes.
NSO App
I don't know if the NSO app still works if I do this after pushing the certificate, so I'm doing it here.
Grab yourself an APK of the NSO app.
I hate using a proprietary app but there just wasn't really an open source solution, as Aurora Store seems to be broken and I don't want to log in with Google.
Plus, it's just an emulator anyway. So I just used APKMirror.
-
Launch the AVD. You can use the "play" button in the "Virtual Device Manager" window.
- Alternatively, you can use the command in the "Pushing Certificate" section.
- Download the NSO APK bundle (.apkm) and the APKMirror Installer APK.
- Push the NSO APK bundle to the emulator's download folder by `adb push <whatever the file is named>.apkm /storage/emulated/0/Download/`.
- Install the APKMirror Installer APK using `adb install <name of the apkmirror apk>.apk`.
- Launch the installer and install the APKM file.
- Launch the NSO app, log in, and verify that you can open SplatNet 3.
Running MITMProxy
Open a terminal, and run `mitmweb`.
A browser tab should open that says "mitmproxy is running".
The following is copied from the [offcial MITMProxy certificate installation page](https://docs.mitmproxy.org/stable/howto-install-system-trusted-ca-android/).
Open a new terminal (tab) and run these 2 commands:
- `cd ~/.mitmproxy`
- `hashed_name=\`openssl x509 -inform PEM -subject_hash_old -in mitmproxy-ca-cert.cer \| head -1\` && cp mitmproxy-ca-cert.cer $hashed_name.0`
After that, you should have a new file named "<some letters and numbers>.0" in the directory.
Pushing Certificate
Now we will push that new file you created into the emulator.
Again, copying the MITMProxy page and the GitHub issue, run these:
- `emulator -list-avds` to find what your AVD name is.
- `emulator -avd <avd_name_here> -writable-system -feature -Vulkan -http-proxy 127.0.0.1:8080`. Replace `<avd_name_here>` with the AVD name.
- `adb root && adb shell avbctl disable-verification && adb reboot` and wait for it to reboot.
- `adb root && adb remount`. If it tells you to reboot, do `adb reboot` to reboot it and WAIT, and then `adb remount` again.
- `adb push <path_to_certificate> /system/etc/security/cacerts`. You should be in the directory `~/.mitmproxy`, so just replace `<path_to_certificate>` with the file name you obtain in the last section.
- `adb shell chmod 644 /system/etc/security/cacerts/<name_of_pushed_certificate>`. This command is slightly different from the one provided in the guide. This uses `644` instead of `664` to make its permission the same as other certificates.
- `adb reboot` and wait for the reboot.
Obtaining Tokens
Close NSO app if you had it opened. Re-launch it and go into SplatNet 3.
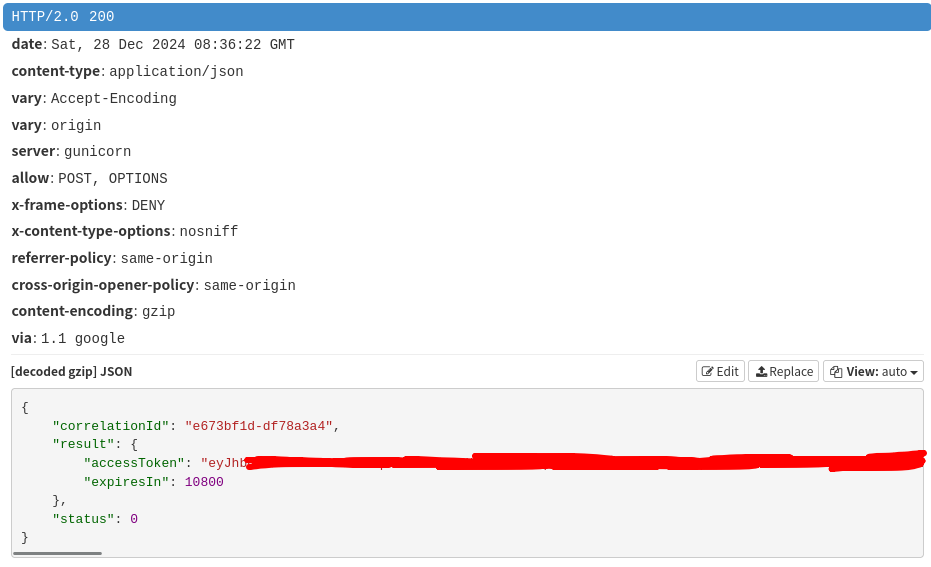
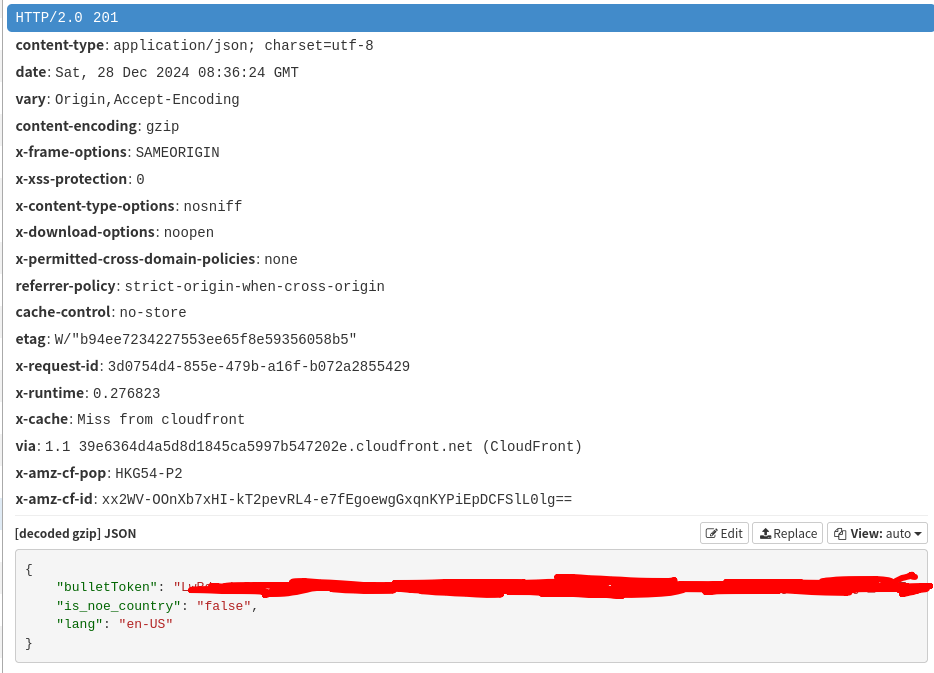
The MITMProxy tab of your browser should have things popping up. Look for these 2 requests:
- POST https://api-lp1.znc.srv.nintendo.net/v2/Game/GetWebServiceToken
- POST https://api.lp1.av5ja.srv.nintendo.net/api/bullet_tokens
Click on one of them and select the "Response" tab on the left block.
You want to grab the value of `result.access_token` from `GetWebServiceToken` and `bullet_tokens` from `bulletToken`.
Using the Tokens
This is a very specific example for "s3s", the Splatoon 3 stat.ink battle uploader.
- Go to where you installed s3s.
- Open the file `config.txt` with a text editor.
- Paste the `access_token` in the `gtoken` field.
- Paste the `bullet_token` in the `bullettoken` field.
- Run s3s like normal.
- Profit!


